Decorating a cake for the first time can feel a little intimidating, especially when you scroll through social media and see those impossibly polished creations. The good news is that you don’t need a culinary degree, a closet full of specialty tools, or hours of practice to make a cake that turns heads. With a handful of beginner-friendly techniques and a bit of patience, your homemade cakes can look just as lovely as anything you’d order from a bakery.
These 10 DIY cake decorating ideas for beginners are designed to build your confidence one step at a time. Some take just minutes, others let you slow down and enjoy the process. Every one of them uses tools you probably already have in your kitchen, plus a few affordable supplies that are easy to find online or at any craft or baking store. Whether you’re decorating a birthday cake, a holiday centerpiece, or just a sweet treat for the weekend, these ideas will help you create something you’re genuinely proud of.
Best of all, once you try a few of these, you’ll start to see cake decorating less as a skill reserved for professionals and more as a fun, creative outlet you can return to again and again. Let’s dive in.
Beginner-friendly cake decorating doesn’t require fancy equipment or years of training. These 10 DIY cake decorating ideas use basic tools, store-bought shortcuts, and approachable techniques so anyone can create a cake that looks beautiful. Start with simple ideas like piped buttercream swirls, fresh fruit toppings, or a rustic naked cake, then work your way up to techniques like ombré frosting, chocolate ganache drips, and stenciled cocoa patterns. Most projects take under an hour and cost very little, making them perfect for birthdays, holidays, or weekend baking sessions with family.
1. Classic Buttercream Swirls
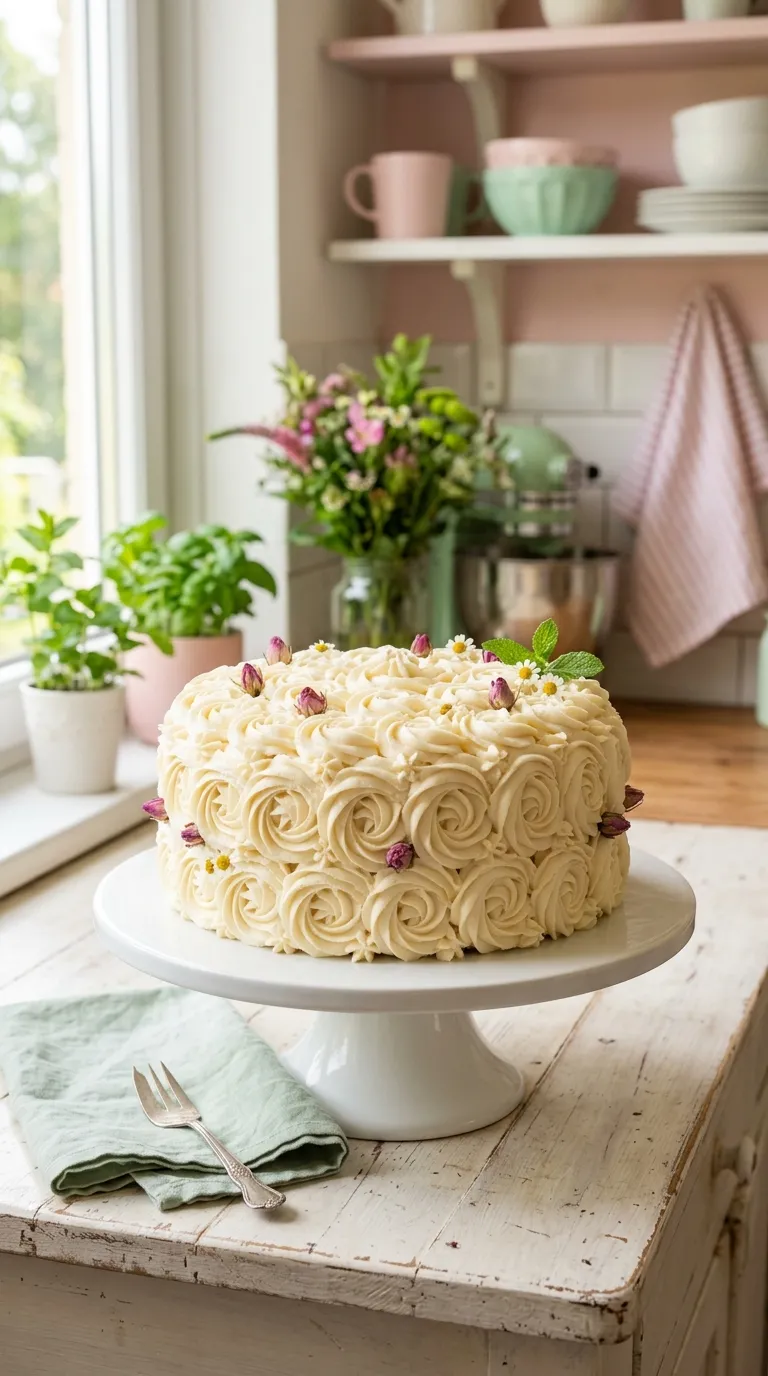
There’s something timeless about a cake covered in soft, fluffy buttercream swirls. It looks like it took hours, but the truth is you can master it on your very first try. The key is using a piping bag fitted with a large open star tip, often labeled 1M or 2D. If you don’t own a piping bag, a gallon-sized zip-top bag with a corner snipped off works just fine for a more rustic look.
Start by crumb coating your cake with a thin layer of buttercream, then chilling it for about 20 minutes. This creates a clean base and prevents crumbs from pulling up into your top coat. Once chilled, apply a generous final layer of buttercream and smooth it lightly with a bench scraper or the back of a large spoon. Then, starting at the bottom, pipe overlapping swirls in a circular pattern until the entire cake is covered.
Materials needed: one batch of buttercream, a piping bag, a large star tip, a bench scraper, and a turntable if you have one. Time required is roughly 30 to 45 minutes, and the difficulty is genuinely beginner-friendly. For a fun variation, tint two batches of buttercream in complementary colors and alternate them as you pipe. A Pro Tip: if your buttercream feels too soft to hold its shape, refrigerate it for 15 minutes before piping.